Building a basement bathroom is a huge project. It’s large-scale, and time-consuming but, not impossible. If you’re willing to commit to it, it can turn out beautifully. Basement bathrooms can increase convenience and be a great use of space. You could convert your basement into a fully functioning space. You could also just install an extra bathroom for ease of use.
Required Tools for Finishing a Basement Bathroom
- 4-in-1 screwdriver
- Cordless drill
- Hammer
- Level
- Miter saw
- Rags
- Reciprocating saw
- Safety glasses
- Shop vacuum
- Sledgehammer
- Socket/ratchet set
- Spade
- Stepladder
- Tape measure
- Trowel

Required Materials for a Basement Bathroom
- 2-in. plastic and cast iron pipe and fittings
- 2x4s
- 3-in. plastic and cast iron pipe and fittings
- 4-in. plastic and cast iron pipe and fittings
- Band couplings
- Concrete
- Pipe glue
How to finish a basement bathroom? Step by Step
Finishing a basement bathroom is a complicated task. Here’s a step-by-step on how to do it.
Step 1 – Drainage
The first step of building a basement bathroom is figuring out the drainage. You have to estimate where the drain hole is in the ground
Step 2 – Planning and Design Phase
In this stage, you can decide the size of your bathroom and its placement in your basement. Correctly planning and designing your bathroom will help you cut costs in further stages. For example, placing the bathroom in an area where utilities like electrical lines and outlets are installed. It is also wise to try and place the bathroom in line with the bathrooms above. This will make aligning the electrical lines and drain pipes with the rest of the house easier.
Also, Read – 5 Best Wood for Bathroom Cabinets
The designing phase will also be where you pick the style of your bathroom. You can choose tiles, cabinets, and other fixtures at this stage. Faucets and showerheads are available in the market for as cheap as $20. But, do not compromise on quality to cut costs. This will only lead to more expenses in repairs in the future.
Step 3 – Permitting Phase
The permitting phase is most important in building a basement bathroom. In most cases, renovating a basement will need a permit. Not getting it beforehand could lead to legal issues. You may face a fine, have to redo your work, or even have to completely remove the renovations. It is best to comply with the rules and get a permit before starting any work.
Floor Plans
The first phase of getting a permit is creating a floor plan. This helps lay down an idea of the space. A floor plan will show where each part of your bathroom goes and will simplify your work.
Floor plans detail the plumbing work as well as electrical lines in your bathroom. If needed, any HVAC work requirements will be mentioned here as well.
File for Permit
Once the floor plans are ready, you will have to submit them to your local county or city office. The plan either gets approved or you will get called in to discuss changes. Once the plans get approved, you will receive your permit. With your permit, you can begin working on the bathroom construction.
Step 4 – Installation Phase
The next phase in your basement bathroom project will be ’installation’. This is when everything starts falling into place one by one. Beginning from the pipes and ending at aesthetic hardware.
1. Laying out the Wall
You will begin by laying out the skeletal structure of the floor and walls first. This will give an understanding of where the shower wall, bathroom door, and other basic structures go.
2. Sewage
Once the layout is set, you have to install a sewage pump. The pump allows for the sewage waste to get lifted to the higher floors. With this, all bathroom waste can be sent into the existing sewage system for extraction. You can skip this step if your basement has a pre-installed sewage pump.
3. Trenches and Drain Pipes
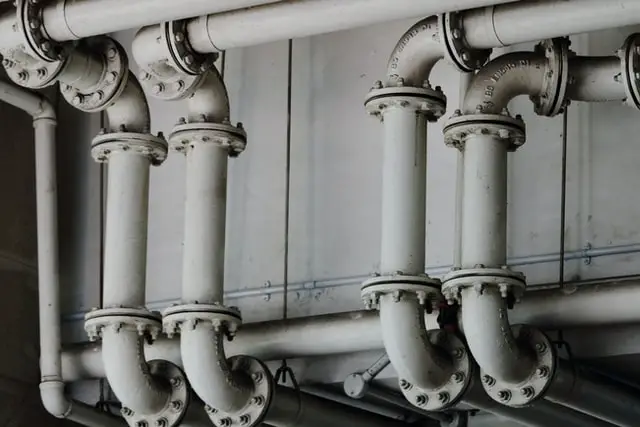
The next step is digging out trenches and laying your drain pipes. If you have a concrete floor, you will have to demolish it first. Then, you need to mark out the existing drainage system. This will help you understand where the drain hole should sit on the floor. which is then connected to the main drain pipeline leading outside.
Also, Read – Which finish is best for bathroom faucets? (pros and cons)
You can place pipes under and above the floor during this stage. Once the drain pipes are fit in, you will need to get your job inspected. When the city inspector approves the setup, you can fill in the trenches. Pour concrete onto the drain holes and the floor to seal it all in place. Then you can move to the next step.
4. Electrical Lines
Once you pour the concrete it will have to sit untouched until it’s set. When the floor is set, you can work on the electricals. This stage will include setting up electrical boxes. You will wire up your bathroom and connect all electrical fixings here. After finishing the wiring, a city inspector will once again, inspect and approve the work. This has to be done to make sure everything is safely installed and in compliance with the regulations.
5. HVAC
If you have to install a new venting system, now is the time to do it. Add the ductwork and get it signed off by an inspector. Basements with proper air and heating systems do not need extra HVAC work done.
6. Insulation and Dry Wall
If the above steps have been completed and approved, you can start finishing up the walls. Most basement walls come insulated. But, if you have to add insulation to your walls, they will need to get inspected as well.
If the insulation process is done, you can fix up the drywalls. During this stage, remember to cut out holes for your bathroom fixtures in the drywall. This will include holes for the toilet, sink, bathroom fixtures, and any other pipework.
7. Flooring and Tiling
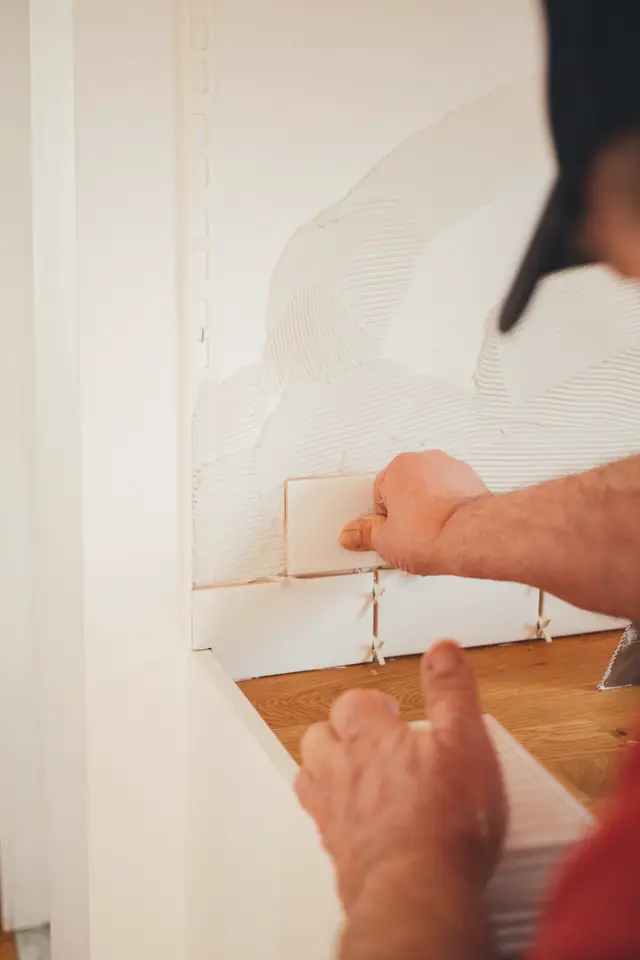
You can begin the flooring and tiling at the same time as the drywall is put in place. But, if you’re doing this project solo, wait until the previous step is finished. Tiling the walls, including the shower, happens at this stage. You can pick from a large selection of colors and patterns. This is when the bathroom truly starts coming together.
8. External Fixtures and Cabinetry
When the walls and floors are set up, you can start adding your bathroom fixtures. Light and plumbing fixtures can be set in now. Along with the faucets and showerheads, you can also place your cabinets.
Also, Read – How to make a dull acrylic bathtub shine
Other hardware like mirrors, towel rods, handles for doors will be placed in this stage as well.
9. Final Inspection
At the end of the process, you will need to get one final inspection done. The city inspector will ensure nothing is out of order and approve the renovations. This will not take much time as most things are pre-approved by now.
How Much Does It Cost To Finish a Roughed in Basement Bathroom?
Finishing a rough-in basement bathroom will cost you at least $4000-$6000. At the lower end, you can finish a project at that cost. But it may cost as high as $25000 if you pick expensive tiling and fixtures. You may have to hire a professional for some stages of building. This will help make the work easier for you but, add to your costs.
What Is Roughed in Plumbing for a Basement?
A rough-in is basically putting together the pipelines for a bathroom. If your basement has a roughed-in bathroom, it means the basic groundwork is laid out. With a roughed-in bathroom, the trenches are dug and the drain pipes are fixed. They just aren’t connected to your existing drain lines yet. Rough-in plumbing can save a lot of time and money when installing a basement bathroom.
How Do You Test Rough-In Plumbing?
You can test if your rough-in plumbing works fine with a simple pressure test. The accepted maximum pressure rate changes from place to place. You can find out the regulated water and air pressure for your area from your local government. Once you have the values, test for the suggested time and pressure levels. This is usually around 80-100 PSI for 15 minutes.
The test is done by hooking the pressure gauge to two water outlets. One holds the gauge and the other is connected to the air compressor. You can now bring the pressure up to the recommended maximum for your area (80-100 PSI). Leave this is set up as is for 15 minutes. At the end of the time span, if the pressure remains the same it means there are no leaks.
The DWV (drain-waste-vent) system will have a different measure of pressure. Remember to check that for your rough-in plumbing test as well.
Wrapping Up
Finishing a basement bathroom is a huge and complex task. It requires time and dedication on your part. But, if you do it right, it can help save you a lot of money. You can transform your basement space and add to your convenience with this. With proper research and instructions, even you can finish your basement bathroom with ease!