Leaky showers are a nuisance in any house, as it means that the internal plumbing system is slowly crumbling. To make matters worse, sometimes showers might even leak inside your walls.
The underlying cause for the leak might be faulty or cheap quality piping or even the age of the house. Most old houses have plumbing issues. These leaks are difficult to spot and can damage your walls and the house’s structural integrity. Not only are these worse, but these leaks are also more damaging than the regular ones. This is because the leaks sometimes require you to knock a wall to get to the root and fix it.
This article will help you identify the signs of a leak, suggest ways to take care of it, and list some preventive measures that you can take to avoid more destruction.
Six Steps to Fix a Shower Leakage Behind the Wall

1. Signs of a Shower Leak Behind The Wall
If your shower has a leakage behind the walls, there are no visible signs for a long time until it is too late to cure the problem yourself. Often, these problems announce themselves with a big, fat water bill. One warning sign that might raise your suspicions and help you get rid of the leakage in its early stages is the dripping sounds of water. Most of the time, a faint drip originating from behind the wall should alert you to take a closer look.
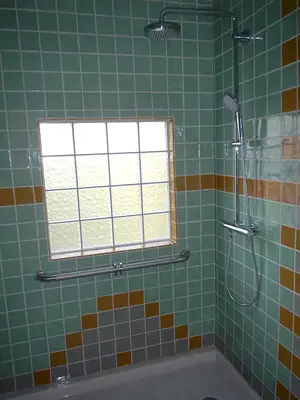
Another sign might be tiny droplets or dried water dots on the wall. Shower valves are often the main culprits when it comes to leakage issues. These are called pinhole leaks because they are small and unnoticeable to the untrained eye. These pinhole leaks look like dry water spots on the wall, or water usually never reaches. Sometimes, these leaks might become big enough to drip down from the shower ceiling.
If your shower’s joints wear off or are not installed properly, the leakage might stem from that. In this case, you can identify an internal leak by feeling the drywall area to see if it is wet or soft.
2. Identify Where Your Shower Is Leaking
If you have observed all the signs and are certain that the shower leak is behind the wall, you can do two things. First, you can quickly judge whether or not there is any space between the valve and the pipe connection. You can then check for any weak spots or leaky points. You might have to remove the shower plate as well, sometimes, to get a good look at the valve.
Also, Read – How to stop water from running out of shower
Second, the proper way to determine where the leak originates is to cut out a part of the wall closest to the spongiest, wettest area. You can cut out a piece from behind your valve so you can check it thoroughly.
If you want to save yourself the trouble of cutting and making holes in your wall, then consider installing a panel from where you can easily check up on your plumbing from time to time.
3. Cut an Inspection Window
To fix the leak, you will need a clear view of where the problem stems from. To check where to cut out a window to inspect the damage, you need a stud finder. Once you locate the stud (usually placed at about 16 inches from the center), start lightly knocking on the wall and hearing the sounds. Drywall will sound quite different from a leaky one.
Usually, your window needs to be 10 x 8 inches to leave enough space around the stud while cutting it.
4. Find a leaking spot
The best way to go on from this point is to pay attention to any water stains. Usually, there are hard water stains on the tub, under the drain of the tub, and the border of the shower tile. To ensure that these leaks do not go in deeper, let the water run for a bit and observe these small leaks.
5. Turn on the Shower
Most modern houses come with an outer or front shower valve. As a result, the leakage is impossible to detect from behind the shower. A simple solution to ensure that you can spot the leak is to turn the shower on and observe. If you spot any water around the piping, even tiny drops, this is the leaking spot. Usually, the leakage point is the shower arm or the valve. Read on to see how to fix them both.
6. Fix a Leaking Shower Arm or a Leaky Valve
To fix a leaky shower arm; you will first need to remove the escutcheon or the plate that hides the shower arm. Then, unscrew the arm and check the pipe threading and joints. Often, a weak joint is the cause of a break and leak. Carefully remove the dry pipe joint from the shower arm and clean it gently with a bristle brush (preferably made of brass). Polish the arm well and close up the shower arm thread with a tough adhesive or tape, such as Teflon. Sometimes, leaks can also happen if the hold is too loose. To strengthen the hold, use a wrench and make sure the tape stays intact as you tighten it. Then, you can clean and reattach the shower arm.
If the shower arm is fine, it must be the valve’s stem or the body causing the problem. If it is just a leaky stem, replace the valve’s cartridge. But, if the leakage still does not stop, then it is the fault of the valve body. You can solve this issue by cutting out the valve and installing a new one carefully. If this is difficult for you, then seek a professional’s help to do it better.
What Are The Causes for The Shower Leak Behind A Wall?
As mentioned earlier, if your shower’s joints wear off or are not installed properly, the leakage might stem from that. The leak could result from a dry or weak pipe joint, leading it to burst open.
How Much Damage Can A Leak Cause You?
The damage that a leak might cause to your house depends on the level of the leak. If the area is not treated or fixed, you might end up putting your house’s structural integrity in danger. Most pipes run down deep within the walls to reach every tap, outlet, and basin in the house. Depending on where the leak starts at, you may need to knock the wall down to investigate it properly.
Apart from these problems, the biggest damage that a leaky shower wall might cause is mold infection. As the leakage is within the wall and it is difficult for air to pass by freely through it, mold and mildew turn it into a breeding spot. If you find a strong mold presence under the wall, you will have to replace the entire drywall and treat the area with cleaning agents to remove all mold traces.
Wrapping Up
We saw how damaging a shower leak can be, especially if it’s hidden behind a wall. It is a hassle, but it is also costly to fix and, often, more difficult. You can fix most of the leaks at home, but if the leak is old and the damaged area is wider, we recommend you call in a plumber to fix it. If it is just a leaky valve, you can be easily patched up and replaced. But, if you cannot find the root cause of the leak, instead of digging around and doing more harm, you should ask a professional to look at it instead of digging around and doing more harm.
