Have you ever found yourself sitting on your couch in your home and looking up to suddenly find a wet ceiling or a discolored patch on the ceiling? If you haven’t found yourself in such a situation, well, then you are lucky. For the unfortunate few, that would mean you might have a leaky shower drain. A leaking shower drain is most likely the cause of water damage on the wall or ceiling. Unfortunately, if all your rooms are on the same floor, it would be tricky to find out the cause after major water damage or mold problems.
What causes a leaky shower drain?
Leaks come from many places, so it is vital to determine if the leaking water is from a leaking shower drain or a shower pan. A shower pan is the flooring of the shower and cracks usually cause the leak. Due to the shower drain, leaks are mostly caused by an old and damaged rubber gasket, cracks in the strainer flange, dry and brittle plumbers putty. Sometimes the cause can also be low usage of silicone or plumbers putty.

Before we move forward with the fixing part of the shower drain, we need to understand the setting of the shower drain. First, it is essential to know how the shower drain is connected and how it works.
Also, Read – How to stop water from running out of shower
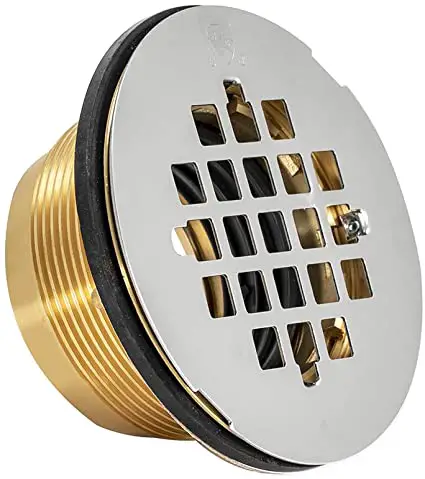
A shower drain consists of P-traps and curved pipes that connect the drain, situated at the end of the shower, with a drain assembly. A drain assembly connects the sink to the plumbing below. It is made up of components like the flange and the strainer. They can be seen from the shower itself. Around the bottom of the strainer flange, there is a line of plumbers putty or silicone caulk to seal it from leaking. A rubber gasket is used to seal the drain body screwed onto the strainer. We do this at the bottom of the shower. There is also a two-inch pipe that falls from the trap, through which the water moves down the drain pipe.
How to Fix a Leaky Shower Drain?

The drain has to be repaired by opening the ceiling for better access to the eye and then working under the shower to fix the leak. But sometimes, you can do the drain repair from inside the shower itself.
The first step towards fixing anything is getting the right tools for the job. For fixing a leaky shower drain, all you need is the following items –
- Head screwdriver
- A flathead screwdriver
- A new gasket should be purchased at a hardware store. Make sure the size is exactly right.
- Tongue-and-groove pliers
- Plumbers putty
- A putty knife
- A cleaning wire brush
- A rag and a flashlight
A few steps listed will guide you on how to fix the leaking in the shower drain. It is not a very expensive job, and you can do it without removing the flooring or tiles. Also, there is no need to take out the shower pan.
1. Remove the Drain Cover

The first step is to remove the drain cover. There are different types of drain covers, so you have to identify the type of cover and remove them accordingly. While some drain covers can be removed using hands or by flipping covers and do not need much effort, others involve removing the entire drain assembly. Next, use the screwdrivers or the set of pliers to remove the drain cover carefully. You can take out drain covers by turning them towards the right till the bolt is unthreaded from the crossbar. Remember to store the screws removed, so it is easier to put the cover back after the work is finished.
After removing the drain cover, remove the drain strainer. Use the tongue-and-groove plier to hold the center of the strainer and turn in the counterclockwise direction. This will loosen the strainer body, which you can pull from the opening and keep on the side.
Also, Read – How to get rid of Calcium Buildup in Shower Drain
You have to remove any old plumbers putty from the strainer body. You can pull using your hands or use the flathead screwdriver to remove the hard chunks stuck in the threads. This is important because the strainer body must be clean when you reinstall it unless you use a new one.
2. Discard the Compression Gasket
A drain body will be connected directly to the drain pipe below the strainer body. Move it to the side, and there will be a rim that will have a gasket you need to remove. Use the pliers to do so. Place the pliers on each side of the gasket and turn counterclockwise. Keep turning it to the right till it comes loose. Pull the gasket out by pinching one side by the plier and then throw it away. Keep the flashlight near to use if it is too dark to see.
3. Remove the Shower Drain Body
So the next step will involve removing the shower drain body. Sometimes you can do it without removing the drain body, but the work goes more efficiently and quickly if you remove it. So now you have to take the hacksaw and make two cuts vertically with a gap of one inch between them on the body. Then it becomes easier to cut into the drain flange. Keep in mind that when you cut through the drain flange, make sure not to damage the shower pad or the pipe riser. Once you are done with this, use the flathead screwdriver to take out the drain using the one-inch cuts. Do not forget to remove the plumber’s putty from the drain body.
4. Clean the Rim of the Drain
Once you remove the drain body, you will see the rim correctly. However, the rim will be very dirty, regardless of how clean you keep the shower. Use the rag to clean the rim thoroughly. It must be cleaned so that the new gasket to be fixed adheres well to the surface. The dirt and grime do not provide a stable surface.
You also have to clean the opening of the drain. For this, use the wire brush to brush the opening threads so that all the dust collected or the remaining plumbers’ putty is swept away. Again, this makes the installation process of the gasket easier.
5. Install the New Gasket
The process involving removing various parts ends here. After cleaning away the debris formed, it is finally time to reinstall the new parts. All you have to do is slide the new gasket into the opening. Keep in mind that it should be in the center of the rim of the drain body.
You also have to coat the strainer body’s outside with the plumber’s putty before fixing it inside. You can use your fingers to spread it evenly across and make sure most of the putty is on the underside of the rim of the strainer. You also have to confirm that all the sides have been covered with putty.
6. Screw-in the New Shower Drain Body and Seal It With Putty

You have to fit the shower drain body into the opening. Place it inside and turn the drain body clockwise to tighten it. There will be extra putty coming outwards from the edge of the drain body. This is a sign that the body is fully tightened enough.
7. Remove Any Excess Putty From Around the Drain
To remove the excess putty from around the drain, use the putty knife to scrape it off. You can also use the rag to make the edge more clean and sharp. Let the putty dry overnight to adhere well to the drain threads. Then, you can use the shower the next day without worrying about the water leaking from the ceiling.
How much does it cost to fix a leaking shower drain?
A leak in your house will lead to severe damage and nasty smells if not taken care of immediately. A visit from the plumber to fix anything in the bathroom will be any amount ranging from 100$ to 4000$. Not to worry, a simple leak in the shower is relatively cheaper than you think. It can range from 100$ to 300$ depending on various factors.
There are additional costs on replacement. The prices depend mainly on the problem, but they also differ based on repair, material, type of shower, etc.
Wrapping Up
Fixing a leak as soon as possible after finding it out is very important. Prolonging the leaky shower will cause additional problems that will add to your expenses later on. On the other hand, fixing a leaky shower drain is not that difficult. Get the right tools, follow the steps correctly, and voila! You will have accomplished an excellent task. And if anything goes wrong, the plumber is just a phone call away!
